
In any solar photovoltaic (PV) system, the inverter is the heart of the system, converting DC power from solar panels into usable AC electricity. While much attention is given to inverter selection, proper installation of the inverter stand is equally critical for safety, performance, and durability.
An improperly installed inverter stand can lead to vibration issues, overheating, electrical hazards, and increased solar installation charges due to maintenance and repairs. Correct mounting and placement of electrical components is essential for reliable renewable solar installations.
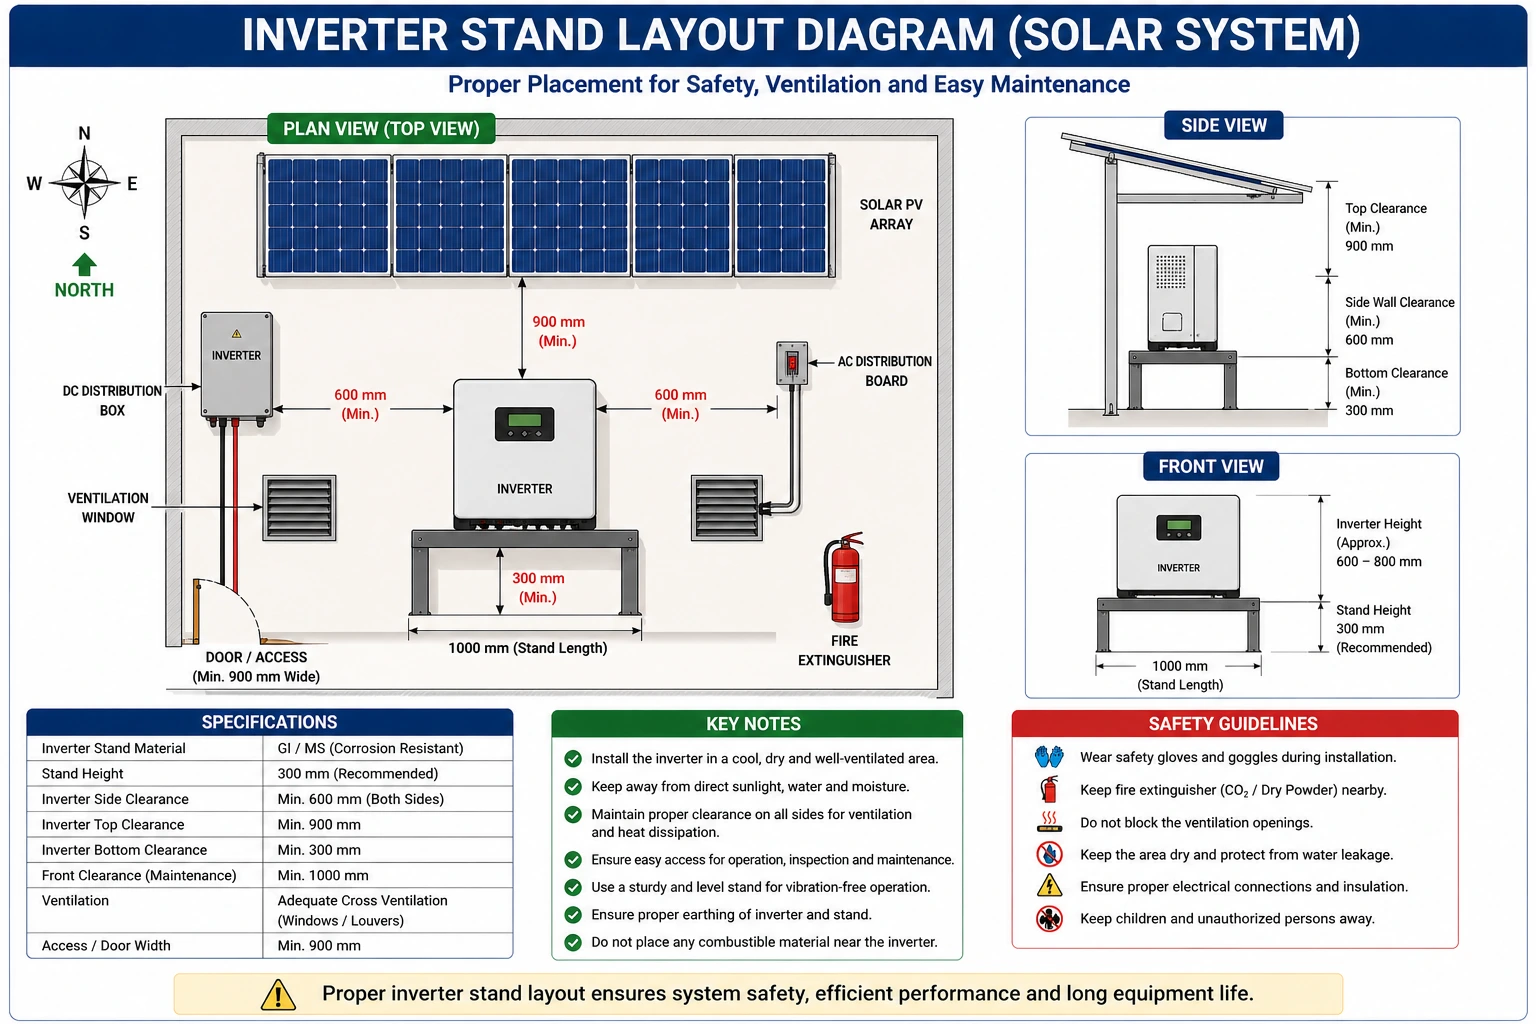
This blog provides a complete step-by-step guide to installing an inverter stand as per drawings and manufacturer manuals, ensuring safety, compliance, and optimal solar electricity generation.
Importance of Proper Inverter Stand Installation
1. Structural Stability
Provides strong support for the inverter.
2. Heat Management
Ensures proper ventilation and cooling.
3. Safety
Prevents electrical hazards and accidents.
4. Ease of Maintenance
Allows easy access for inspection and servicing.
5. Compliance
Ensures adherence to installation standards.
Components of Inverter Stand Setup
- Inverter stand/frame
- Anchor bolts
- Fasteners (nuts, bolts, washers)
- Anti-vibration pads
- Protective coatings
Tools and Materials Required
Tools
- Drilling machine
- Torque wrench
- Spanners and wrenches
- Measuring tape
- Spirit level
Materials
- Inverter stand structure
- Anchor bolts
- Fasteners
- Protective coatings
Step-by-Step Installation Process
Step 1 – Mark Installation Area
- Mark positions as per the drawings
- Ensure proper spacing
Step 2 – Prepare Foundation/Base
- Construct a concrete base if required
- Ensure a level surface
Step 3 – Assemble Inverter Stand
- Assemble frame components
- Ensure proper alignment
Step 4 – Fix the Stand to the Floor
- Use anchor bolts
- Ensure firm fixing
Step 5 – Install Anti-Vibration Pads
- Reduce vibrations
- Protect inverter components
Step 6 – Apply Protective Coating
- Prevent corrosion
- Enhance durability
Step 7 – Check Alignment and Leveling
- Use a spirit level
- Ensure proper positioning
Step 8 – Mount the Inverter on the Stand
- Place the inverter securely
- Follow manufacturer instructions
Step 9 – Secure the Inverter
- Tighten bolts properly
- Ensure stability
Step 10 – Final Inspection
- Verify alignment and stability
- Check compliance with drawings
Quality Checks
1. Structural Stability
Ensure the stand can support the inverter’s weight.
2. Leveling
Verify horizontal alignment.
3. Fastener Tightness
Ensure proper torque application.
4. Ventilation Clearance
Ensure adequate airflow around the inverter.
5. Compliance with Manuals
Follow manufacturer guidelines.
Conclusion
Proper installation of an inverter stand as per drawings and manufacturer manuals is essential for ensuring safety, durability, and efficient performance of solar PV systems. By following structured installation steps and maintaining quality standards, installers can prevent risks and improve system reliability.
Correct mounting and placement of components are crucial for successful renewable solar installations. Additionally, adherence to standards set by the Ministry of New and Renewable Energy ensures compliance and operational safety.
With the right installation approach, solar professionals can optimize solar panel system cost, enhance solar electricity generation, and support sustainable solar energy for home use and large-scale renewable solar solutions.
FAQs
Q1. Why is an inverter stand important?
Ans: It provides structural support and ensures safe operation.
Q2. What should be checked before installation?
Ans: Drawings, site conditions, and load-bearing capacity.
Q3. How does proper installation affect solar panel system cost?
Ans: It reduces maintenance and improves efficiency.
Q4. Is ventilation important for inverter installation?
Ans: Yes, it prevents overheating and improves performance.
Q5. Are safety measures necessary during installation?
Ans: Yes, they ensure safe and efficient execution.
Solar for Metal & Fabrication Units: Cost, Benefits and Installation in India
A practical guide on solar for metal and fabrication units in India covering installation cost, benefits, system options, and the installation process.
Workmanship Inspection and Tool Proficiency in Solar PV Projects
A complete guide to solar PV workmanship and tool proficiency, helping installers maintain quality standards and demonstrate technical competency.
Difference Between Single-Phase and Three-Phase Voltage and Its Use for Solar PV Installer – Complete Guide
Understanding the difference between single-phase and three-phase voltage is essential for solar PV installers. While single-phase supply is common in residential systems, three-phase power is widely used in commercial and industrial solar projects. This complete guide explains electrical phase differences, applications in solar installations, and how choosing the right phase connection impacts system efficiency, safety, and performance.
Solar PV Array Troubleshooting Guide: Diagnose & Fix Issues
Discover how to troubleshoot solar PV arrays with a step-by-step guide to diagnosing common faults, performing electrical tests, identifying damaged modules, and restoring optimal solar system performance.

Environmental Hazards in Solar PV Installations Guide
A complete guide to identifying and mitigating safety hazards in solar PV systems, including risk assessment, hazard control, preventive measures, and workplace safety practices.
Solar PV Fault Escalation & Troubleshooting Guide
A complete guide to escalating unresolved faults in solar PV systems, including troubleshooting procedures, documentation, supervisor notification, and technical support for efficient maintenance.
Solar Inverter Specifications Explained: How to Read Datasheets & Choose the Right Inverter
Choosing the right solar inverter is critical for system performance and safety. This guide explains how to read inverter datasheets, understand key specifications, and select the best inverter for your solar project.
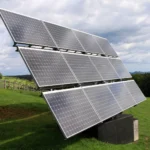
Why Is Investing In Grade A Panels Important?
Investing in Grade A solar panels guarantees superior performance, safety, and maximum return on your solar investment.