In any solar photovoltaic (PV) system, the inverter is the heart of the system, converting DC power from solar panels into usable AC electricity. While much attention is given to inverter selection, proper installation of the inverter stand is equally critical for safety, performance, and durability.
An improperly installed inverter stand can lead to vibration issues, overheating, electrical hazards, and increased solar installation charges due to maintenance and repairs. Correct mounting and placement of electrical components is essential for reliable renewable solar installations.
This blog provides a complete step-by-step guide to installing an inverter stand as per drawings and manufacturer manuals, ensuring safety, compliance, and optimal solar electricity generation.
Importance of Proper Inverter Stand Installation
1. Structural Stability
Provides strong support for the inverter.
2. Heat Management
Ensures proper ventilation and cooling.
3. Safety
Prevents electrical hazards and accidents.
4. Ease of Maintenance
Allows easy access for inspection and servicing.
5. Compliance
Ensures adherence to installation standards.
Components of Inverter Stand Setup
- Inverter stand/frame
- Anchor bolts
- Fasteners (nuts, bolts, washers)
- Anti-vibration pads
- Protective coatings
Tools and Materials Required
Tools
- Drilling machine
- Torque wrench
- Spanners and wrenches
- Measuring tape
- Spirit level
Materials
- Inverter stand structure
- Anchor bolts
- Fasteners
- Protective coatings

Step-by-Step Installation Process
Step 1 – Mark Installation Area
- Mark positions as per the drawings
- Ensure proper spacing
Step 2 – Prepare Foundation/Base
- Construct a concrete base if required
- Ensure a level surface
Step 3 – Assemble Inverter Stand
- Assemble frame components
- Ensure proper alignment
Step 4 – Fix the Stand to the Floor
- Use anchor bolts
- Ensure firm fixing
Step 5 – Install Anti-Vibration Pads
- Reduce vibrations
- Protect inverter components
Step 6 – Apply Protective Coating
- Prevent corrosion
- Enhance durability
Step 7 – Check Alignment and Leveling
- Use a spirit level
- Ensure proper positioning
Step 8 – Mount the Inverter on the Stand
- Place the inverter securely
- Follow manufacturer instructions
Step 9 – Secure the Inverter
- Tighten bolts properly
- Ensure stability
Step 10 – Final Inspection
- Verify alignment and stability
- Check compliance with drawings
Quality Checks
1. Structural Stability
Ensure the stand can support the inverter’s weight.
2. Leveling
Verify horizontal alignment.
3. Fastener Tightness
Ensure proper torque application.
4. Ventilation Clearance
Ensure adequate airflow around the inverter.
5. Compliance with Manuals
Follow manufacturer guidelines.
Conclusion
Proper installation of an inverter stand as per drawings and manufacturer manuals is essential for ensuring safety, durability, and efficient performance of solar PV systems. By following structured installation steps and maintaining quality standards, installers can prevent risks and improve system reliability.
Correct mounting and placement of components are crucial for successful renewable solar installations. Additionally, adherence to standards set by the Ministry of New and Renewable Energy ensures compliance and operational safety.
With the right installation approach, solar professionals can optimize solar panel system cost, enhance solar electricity generation, and support sustainable solar energy for home use and large-scale renewable solar solutions.
FAQs
Q1. Why is an inverter stand important?
Ans: It provides structural support and ensures safe operation.
Q2. What should be checked before installation?
Ans: Drawings, site conditions, and load-bearing capacity.
Q3. How does proper installation affect solar panel system cost?
Ans: It reduces maintenance and improves efficiency.
Q4. Is ventilation important for inverter installation?
Ans: Yes, it prevents overheating and improves performance.
Q5. Are safety measures necessary during installation?
Ans: Yes, they ensure safe and efficient execution.
How to Calculate Savings from Rooftop Solar Solutions: A Complete Guide
Calculating savings from rooftop solar solutions is essential for planning your investment. This guide explains how to estimate cost reduction, return on investment, and long-term financial benefits for residential, commercial, and industrial solar projects.

Solar for Cold Storage Units: Cost, Benefits, Installation & ROI in India
A complete guide on solar systems for the FMCG industry in India covering installation cost, benefits, ROI, system sizing, and the installation process.

Latest MNRE List: Approved Solar Module Manufacturers
Check the latest MNRE-approved list of solar module manufacturers to ensure quality and compliance for your solar projects in India.
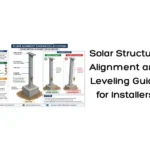
Solar Structure Alignment and Leveling Guide for Installers
A step-by-step guide to solar tracking system installation, covering setup, alignment, and best practices for maximum efficiency and performance.
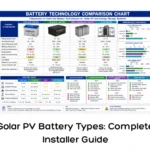
Solar PV Battery Types: Complete Installer Guide
A complete guide to the types of batteries used in solar PV systems, helping installers and solar professionals choose the right energy storage solution.
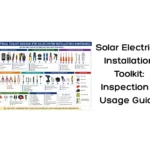
Solar Electrical Installation Toolkit: Inspection & Usage Guide
A complete guide to the electrical installation toolkit for solar installers, including inspection procedures, tool usage, and safety practices.

6 Innovative Applications of Solar Energy You Should Know About
Explore how solar energy is revolutionizing daily life and industries. From solar-powered transport to smart cities, discover six groundbreaking solar applications shaping a cleaner, smarter future.
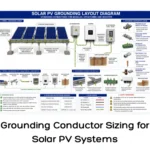
Grounding Conductor Sizing for Solar PV Systems
A complete guide to determining grounding conductor size for solar PV systems, ensuring safe, compliant, and reliable installations.