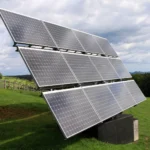
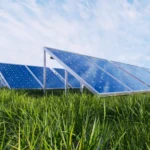
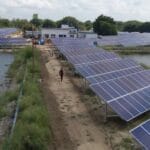
Standalone solar photovoltaic (PV) systems are independent power generation systems that operate without connection to the utility grid. These systems are widely used in remote villages, rural electrification projects, telecom towers, agricultural applications, street lighting systems, water pumping installations, off-grid homes, and industrial facilities where grid access is unavailable or unreliable.
A standalone solar PV system typically consists of solar panels, charge controllers, battery energy storage systems, inverters, protection devices, monitoring equipment, and associated electrical infrastructure. Before a standalone solar system can begin supplying power, a structured startup procedure must be performed to ensure all components operate safely, efficiently, and according to design specifications.
The startup process is a critical commissioning activity that verifies installation quality, confirms equipment functionality, establishes baseline operating conditions, and ensures safe energization of the entire renewable solar system. Incorrect startup procedures can lead to equipment damage, battery failures, inverter faults, safety hazards, and reduced system performance.
Proper startup and commissioning procedures are essential for ensuring efficient solar electricity generation and long-term renewable energy technology reliability.
This comprehensive guide explains the startup procedure for standalone solar PV systems, required inspections, startup sequence, testing requirements, documentation practices, safety precautions, and best practices.
What is a Standalone Solar PV System?
A standalone solar PV system is an off-grid renewable energy system that generates and stores electricity independently of the utility grid.
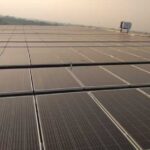
The system typically includes:
- Solar PV modules
- Mounting structures
- Charge controller
- Battery bank
- Solar inverter
- DC and AC protection devices
- Monitoring equipment
- Distribution panel
These systems rely on battery storage to provide power during periods without sunlight.
Importance of Proper Startup Procedures
The startup process ensures that:
- The equipment operates correctly
- Safety systems function properly
- Batteries are protected
- Design specifications are met
- Performance expectations are verified
A structured startup procedure reduces commissioning risks and improves system reliability.
Objectives of Standalone System Startup
The primary objectives include:
Safety Verification
Ensuring safe energization of all system components.
Equipment Protection
Preventing damage during initial operation.
Functional Validation
Confirming proper operation of all equipment.
Performance Assessment
Verifying expected operating parameters.
Documentation
Establishing baseline operational records.
Major Components Involved During Startup

Several components must be verified before startup.
1. Solar PV Array
Converts sunlight into DC electricity.
2. Charge Controller
Regulates battery charging and protects against overcharging.
3. Battery Bank
Stores energy for later use.
4. Solar Inverter
Converts DC electricity into AC power.
5. Distribution Panel
Distributes electrical power to connected loads.
6. Protection Devices
Include:
- Circuit breakers
- Fuses
- Disconnect switches
- Surge protection devices
7. Monitoring System
Tracks operational performance and system status.
Pre-Startup Inspection Requirements
Before startup, a comprehensive inspection must be completed.
Verify Mechanical Installation
Inspect:
- Module mounting structures
- Fasteners
- Supports
- Equipment enclosures
All components should be securely installed.
Verify Electrical Installation
Check:
- Cable routing
- Cable terminations
- Polarity
- Grounding connections
Installation should match the project drawings.
Verify Protection Devices
Confirm proper installation of:
- Fuses
- Circuit breakers
- Disconnect switches
- Surge protection devices
Verify Equipment Labeling
Inspect labels on:
- Batteries
- Inverters
- Charge controllers
- Distribution panels
Proper labeling improves operational safety.
Verify Testing Completion
Confirm successful completion of:
- Continuity tests
- Insulation resistance tests
- Grounding tests
- Battery voltage tests
- Polarity checks
Startup should not proceed until testing is complete.
Tools Required During Startup
Common tools include:
- Digital multimeter
- Clamp meter
- Insulation resistance tester
- Battery tester
- Commissioning checklist
- Manufacturer manuals
- Personal protective equipment (PPE)
Step-by-Step Startup Procedure for Standalone Solar PV Systems
Step 1 – Review Manufacturer Documentation
Before energization:
Review:
- Equipment manuals
- Startup instructions
- Safety guidelines
- Commissioning requirements
All personnel should understand the procedure.
Step 2 – Verify Safe Working Conditions
Ensure:
- Work area is clear
- Equipment is accessible
- Personnel are informed
- Required PPE is being used
Safety should always be prioritized.
Step 3 – Inspect Battery Bank
The battery bank should be checked before energization.
Verify:
- Correct voltage
- Proper polarity
- Secure terminals
- Battery condition
Record battery voltage readings.
Step 4 – Energize the Battery System
For most standalone systems, batteries are energized before the PV array.
Verify:
- Battery bank voltage
- Controller startup status
- Absence of alarms
Many charge controllers require battery connection first.
Step 5 – Start the Charge Controller
Once batteries are connected:
Verify:
- Display operation
- Battery recognition
- Charging parameters
The controller should initialize normally.
Step 6 – Verify Charge Controller Settings
Confirm:
- Battery type selection
- Charging voltage settings
- Low-voltage disconnect settings
- Temperature compensation settings
Incorrect settings can reduce battery lifespan.
Step 7 – Connect the Solar PV Array
Close PV disconnects according to manufacturer instructions.
Verify:
- Array voltage
- Polarity
- Controller charging status
Observe system behavior carefully.
Step 8 – Verify Charging Operation
Confirm that:
- Charging current is present
- Battery charging is active
- Controller status is normal
Record charging parameters.
Step 9 – Start the Inverter
After confirming battery and PV operation:
Initiate inverter startup.
Verify:
- Display operation
- No fault indications
- Proper AC output
The inverter should complete its self-test sequence.
Step 10 – Verify AC Output Parameters
Measure:
- AC voltage
- Frequency
- Current
Compare readings with design specifications.
Step 11 – Connect Electrical Loads
Apply loads gradually.
Monitor:
- Inverter response
- Battery performance
- Voltage stability
Ensure loads operate correctly.
Step 12 – Verify Monitoring System Operation
Confirm functionality of:
- Data loggers
- Communication systems
- Monitoring displays
- Remote monitoring platforms
Monitoring systems should begin collecting operational data.
Important Startup Measurements
Several parameters should be recorded.
Battery Voltage
Record:
- Individual battery voltages
- Total battery bank voltage
Solar Array Voltage
Measure:
- Open-circuit voltage (if required)
- Operating voltage
- Charging Current
Verify charge controller performance.
Inverter Output Voltage
Confirm proper AC output.
Load Current
Verify system load performance.
Energy Meter Reading
Record startup energy values if metering equipment is installed.
Startup Documentation Requirements
Commissioning records should include:
Parameter | Description |
Startup Date | Commissioning reference |
Battery Voltage | Initial battery condition |
Array Voltage | Solar array performance |
Charging Current | Controller operation |
Inverter Output Voltage | AC performance |
Load Status | Operational verification |
Inspector name | Responsible technician |
Accurate records support future maintenance and troubleshooting.
Conclusion
The startup of a standalone solar PV system is a vital commissioning procedure that establishes the foundation for safe, efficient, and reliable operation. Proper startup activities verify installation quality, confirm equipment functionality, protect batteries and inverters, validate charging performance, and ensure that the renewable solar system is ready to deliver dependable power in off-grid applications.
Following structured startup procedures is essential for achieving efficient solar electricity generation and maintaining renewable energy technology performance. Additionally, adhering to technical recommendations and quality standards promoted by the Ministry of New and Renewable Energy helps ensure safe, compliant, and professional solar PV installations.
By conducting thorough pre-start inspections, following manufacturer startup sequences, recording operational measurements accurately, verifying battery and inverter performance, documenting commissioning results, and addressing anomalies promptly, solar installers, EPC contractors, commissioning engineers, and maintenance professionals can optimize solar panel system cost, improve renewable solar system reliability, maximize equipment lifespan, and ensure the long-term success of residential, agricultural, telecom, industrial, and rural electrification solar projects.
FAQs
Q1. What is a standalone solar PV system?
Ans: A standalone solar PV system is an off-grid renewable energy system that operates independently of the utility grid and typically includes solar panels, batteries, charge controllers, and inverters.
Q2. Why are startup procedures important for standalone systems?
Ans: Startup procedures ensure safe energization, verify proper installation, protect equipment, and establish baseline operational data.
Q3. Why are batteries usually connected before the solar array?
Ans: Many charge controllers require battery voltage detection before recognizing the solar array. Connecting batteries first ensures proper controller initialization.
Q4. What measurements should be recorded during startup?
Ans: Important measurements include battery voltage, solar array voltage, charging current, inverter output voltage, load current, and energy meter readings where applicable.
Q5. What should be done if a fault is detected during startup?
Ans: The startup process should be paused, the fault investigated according to manufacturer instructions, corrective actions implemented, and the system retested before proceeding.
Why Is Investing In Grade A Panels Important?
Investing in Grade A solar panels guarantees superior performance, safety, and maximum return on your solar investment.
Solar Industry Faces Growing Losses from Underperforming Equipment
According to the Raptor Maps’ Global Solar Report, the amount of power loss due to equipment anomalies has nearly doubled from 1.61% in 2019 to 3.13% in 2022. This trend is expected to continue, with anomaly-driven power loss potentially growing to almost 6% by 2025.
Demystifying Battery Backup: Everything You Need to Know
Battery backup is essential for uninterrupted power at home and in industries. This guide explains different types of battery backup systems, how they work, their benefits, and tips to choose the right one for reliable energy storage.
UP Electricity Tariff Increase 2015-16: Rates Rise by Rs 0.40–1.00 per Unit – What Consumers need to know
Uttar Pradesh has increased electricity tariffs for 2015-16, ranging from Rs 0.40 to 1.00 per unit. This update explains the revised rates, the sectors affected, and what consumers need to know about the tariff hike.

पीएम सूर्य घर योजना 2025 – मुफ्त बिजली पाने के लिए ऐसे करें आवेदन
पीएम सूर्य घर योजना ऑनलाइन आवेदन 2025: मुफ्त बिजली पाने की आसान स्टेप-बाय-स्टेप प्रक्रिया यहाँ पढ़ें।

India’s Renewable Energy Revolution: The Role of Agrivoltaics
Agrivoltaics, the integration of solar panels with agricultural land, is emerging as a key driver in India’s renewable energy revolution. This blog explains how agrivoltaics supports sustainable farming, increases land efficiency, and contributes to clean energy production, helping India meet its solar energy targets while boosting rural economies.

6 Upcoming Renewable Energy Events in India You Should Attend
The World Environment Expo, 2022 is a business platform that allows national and international equipment
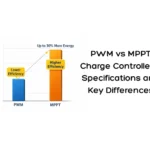
PWM vs MPPT Charge Controllers: Specifications and Key Differences
Choosing the right charge controller is essential for battery performance and system efficiency. This guide compares PWM and MPPT charge controllers, explaining their specifications, working principles, and key differences to help you select the best option.