
Solar photovoltaic (PV) systems are designed to deliver reliable, clean, and sustainable electricity for residential, commercial, industrial, and utility-scale applications. A typical solar power system consists of several interconnected components, including solar PV modules, mounting structures, DC cables, combiner boxes, charge controllers, battery banks (in off-grid and hybrid systems), inverters, AC distribution panels, energy meters, monitoring systems, grounding systems, and protective devices. Since all these components work together as an integrated electrical system, a fault in any one component can affect the overall performance, efficiency, and safety of the installation.
Although modern solar PV systems are highly reliable, faults may still occur due to environmental conditions, aging equipment, improper installation, manufacturing defects, loose electrical connections, insulation failure, communication issues, or component degradation. Effective troubleshooting is therefore one of the most important responsibilities of solar installers, commissioning engineers, EPC contractors, and Operations & Maintenance (O&M) professionals.
Troubleshooting is a systematic process of identifying, analyzing, isolating, and resolving faults while ensuring personnel safety and protecting equipment from further damage. Rather than relying on assumptions or replacing components unnecessarily, technicians should follow a logical sequence of inspections, measurements, testing, documentation, and verification. A structured troubleshooting approach minimizes downtime, improves solar electricity generation, reduces maintenance costs, and extends the lifespan of the entire renewable solar system.
Following standardized troubleshooting procedures is a core competency for professionals involved in the installation, commissioning, testing, and maintenance of solar PV systems.
This comprehensive guide explains the principles of troubleshooting, preparation steps, diagnostic procedures, safety requirements, documentation practices, and industry best practices for identifying and resolving faults in solar PV systems.
What Is Troubleshooting?
Troubleshooting is the systematic process of identifying the root cause of a fault and restoring the system to normal operation through inspection, testing, diagnosis, corrective action, and verification.
Effective troubleshooting helps technicians:
- Detect equipment failures
- Identify electrical faults
- Reduce system downtime
- Improve solar electricity generation
- Protect expensive equipment
- Enhance system safety
Why Are Troubleshooting Guidelines Important?
Standard troubleshooting guidelines help to:
Prevent incorrect repairs
Improve diagnostic accuracy
Reduce maintenance costs
Minimize downtime
Improve renewable solar system performance
Protect personnel
Maintain warranty compliance
Ensure consistent maintenance practices
Common Faults in Solar PV Systems
Technicians may encounter:
- Low power generation
- Inverter shutdowns
- Ground faults
- Insulation failure
- Loose electrical connections
- Damaged PV modules
- Faulty DC or AC cables
- Battery charging problems
- Communication failures
- Protection device trips
- String imbalance
- Hot spots
- Connector failures
- Monitoring system errors
Each fault requires a systematic approach.
Principles of Effective Troubleshooting
Successful troubleshooting should always be:
- Safe
- Systematic
- Evidence-based
- Well documented
- Methodical
- Manufacturer-compliant
- Standards-compliant
Random repairs should always be avoided.
Tools Required
Technicians commonly use:
- Digital multimeter
- Clamp meter
- Insulation resistance tester (Megger)
- Earth resistance tester
- Continuity tester
- Infrared thermal camera
- Power quality analyzer
- I-V curve tracer (where applicable)
- Solar irradiance meter
- Temperature meter
- Data logger
- Laptop with monitoring software
- Personal Protective Equipment (PPE)
All instruments should be calibrated.
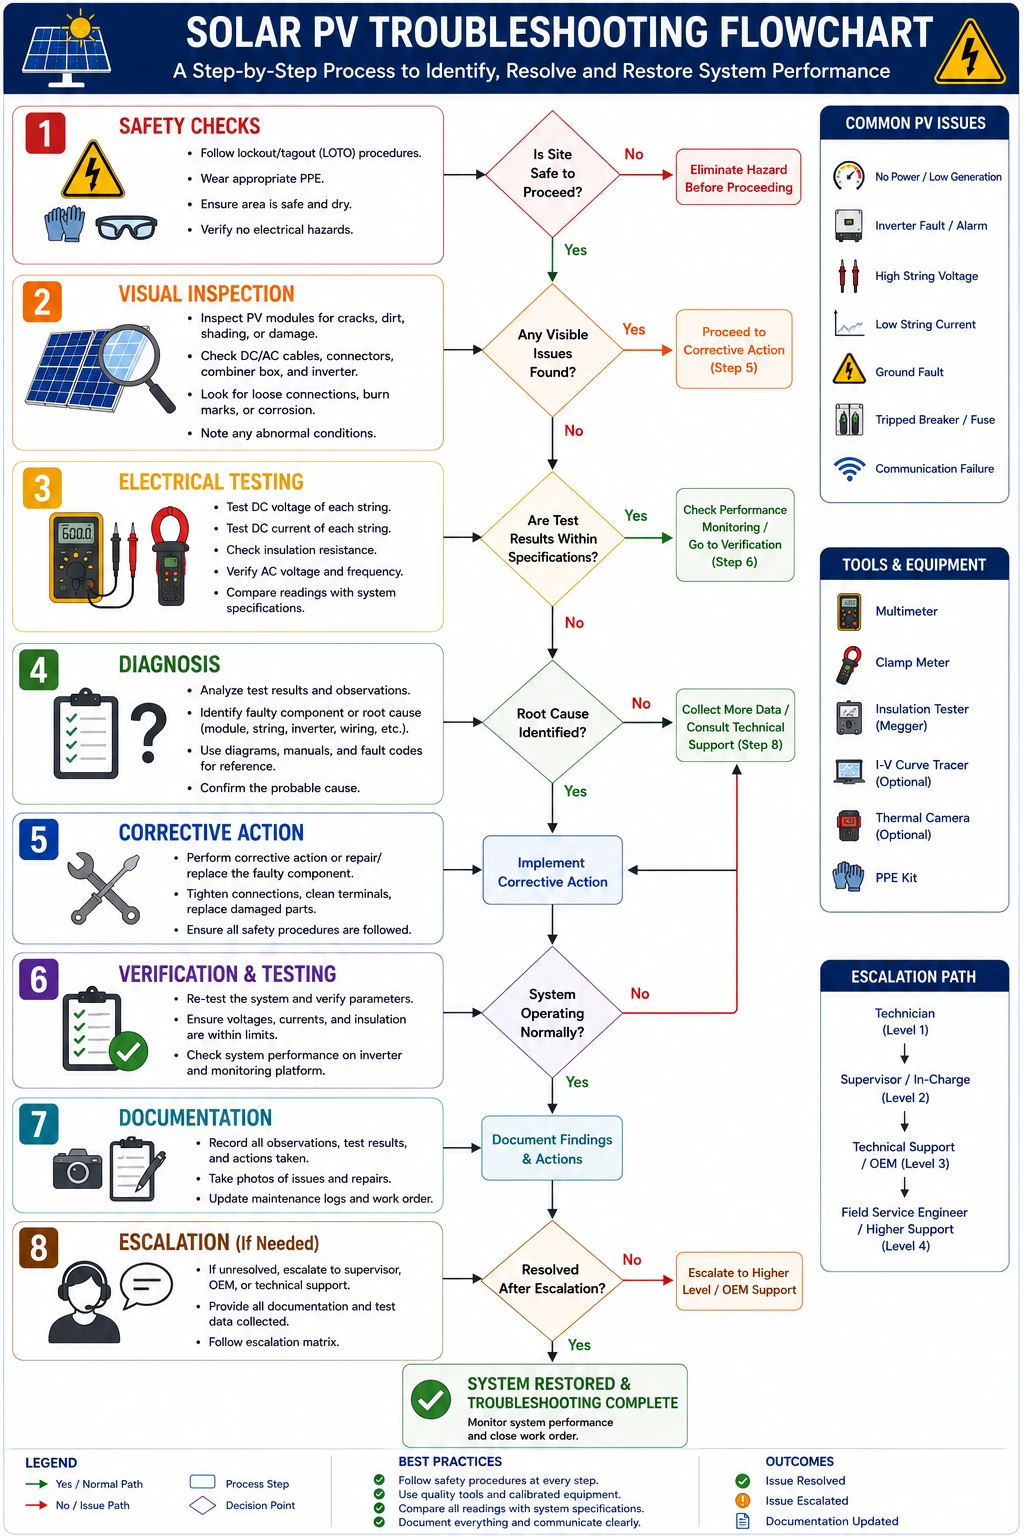
Step-by-Step Troubleshooting Guidelines
Step 1 – Ensure Safety First
Before beginning troubleshooting:
- Follow Lockout/Tagout (LOTO) procedures where applicable.
- Isolate equipment when required.
- Wear appropriate PPE.
- Verify that the work area is safe.
Never compromise safety for speed.
Step 2 – Gather System Information
Review:
- Single-line diagram (SLD)
- Wiring diagrams
- Equipment manuals
- Maintenance records
- Previous fault history
- Commissioning reports
Understanding the system reduces diagnostic time.
Step 3 – Identify the Reported Problem
Clearly define:
- Nature of the fault
- Time of occurrence
- Frequency
- Environmental conditions
- Equipment affected
Accurate problem identification prevents unnecessary testing.
Step 4 – Perform a Visual Inspection
Inspect for:
- Loose cables
- Damaged insulation
- Burn marks
- Corrosion
- Water ingress
- Dust accumulation
- Broken connectors
- Physical damage
- Overheating
Many faults can be identified visually.
Step 5 – Check Alarm Messages and Fault Codes
Review:
- Inverter display
- Monitoring software
- Event logs
- Battery management system (BMS)
- Charge controller status
Manufacturer fault codes provide valuable diagnostic information.
Step 6 – Verify Electrical Parameters
Measure:
- DC voltage
- DC current
- AC voltage
- AC current
- Grid frequency
- Battery voltage
- Ground continuity
Compare readings with design values and manufacturer specifications.
Step 7 – Test Individual Components
Inspect and test:
- Solar modules
- Strings
- Combiner boxes
- Inverter
- Charge controller
- Batteries
- Protection devices
- Cables
- Connectors
- Grounding system
Isolating components helps identify the root cause.
Step 8 – Confirm the Root Cause
Before replacing any equipment:
- Verify test results.
- Rule out external factors.
- Confirm that the suspected component is actually faulty.
Evidence-based diagnosis prevents unnecessary repairs.
Step 9 – Perform Corrective Action
Depending on the fault:
- Tighten loose terminals.
- Replace damaged cables.
- Repair connectors.
- Replace defective protection devices.
- Clean PV modules.
- Correct wiring errors.
- Update firmware (where approved).
Only approved corrective actions should be performed.
Step 10 – Verify System Performance
After repairs:
Verify:
- Stable inverter operation
- Correct voltages
- Normal current flow
- Proper monitoring
- Expected power generation
- Alarm clearance
The system should return to normal operation.
Step 11 – Document All Findings
Record:
- Fault description
- Test results
- Measurements
- Components repaired
- Parts replaced
- Corrective actions
- Final system status
- Technician details
Documentation supports future maintenance.
Step 12 – Escalate Unresolved Faults
If the fault cannot be identified or repaired:
- Inform the site supervisor.
- Contact senior engineers.
- Notify the manufacturer if required.
- Avoid unauthorized repairs.
Professional escalation reduces further risk.
Common Troubleshooting Techniques
Technicians commonly use:
- Visual inspection
- Electrical measurements
- Continuity testing
- Insulation resistance testing
- Thermal imaging
- Sequential isolation
- Component substitution (where approved)
- Monitoring system analysis
- Historical trend analysis
Conclusion
Following structured troubleshooting guidelines is essential for ensuring the safe, reliable, and efficient operation of solar PV systems. Rather than relying on assumptions or replacing components unnecessarily, technicians should adopt a systematic approach that includes safety checks, visual inspections, electrical measurements, fault analysis, component testing, corrective actions, and performance verification. This methodical process enables maintenance personnel to identify the root cause of faults accurately, reduce downtime, protect valuable equipment, and maintain uninterrupted solar electricity generation.
Effective troubleshooting is a core competency for solar installers, EPC contractors, commissioning engineers, and operations and maintenance professionals. Furthermore, adhering to technical recommendations and safety practices promoted by the Ministry of New and Renewable Energy, together with manufacturer guidelines and local electrical standards, ensures that troubleshooting activities are carried out safely, professionally, and in compliance with industry requirements.
By using calibrated testing instruments, maintaining accurate maintenance records, following logical diagnostic procedures, escalating unresolved issues promptly, and implementing preventive maintenance practices, solar professionals can optimize solar panel system cost, improve renewable solar system reliability, maximize solar electricity generation, reduce the cost of solar per kWh installed, and ensure the long-term success of residential, commercial, industrial, and utility-scale solar energy projects.
FAQs
Q1. Why is a systematic troubleshooting approach important in solar PV systems?
Ans: A systematic approach helps identify the actual root cause of a fault, prevents unnecessary replacement of components, improves safety, reduces downtime, and ensures efficient restoration of system performance.
Q2. What is the first step before troubleshooting a solar PV system?
Ans: The first step is to ensure safety by wearing appropriate PPE, following Lockout/Tagout (LOTO) procedures where applicable, verifying that the work area is safe, and reviewing system documentation before beginning inspections.
Q3. Which tools are commonly used during troubleshooting?
Ans: Technicians commonly use digital multimeters, clamp meters, insulation resistance testers, continuity testers, earth resistance testers, infrared thermal cameras, irradiance meters, and monitoring software to diagnose faults.
Q4. When should a fault be escalated to a senior engineer or manufacturer?
Ans: A fault should be escalated when standard troubleshooting procedures fail to identify the root cause, specialized diagnostic equipment is required, or the issue involves complex electronic, firmware, or manufacturer-specific components.
Q5. How does proper troubleshooting improve solar PV system performance?
Ans: Accurate troubleshooting helps restore solar electricity generation quickly, minimizes equipment damage, extends component lifespan, improves renewable solar system reliability, reduces maintenance costs, and enhances the overall return on investment of the solar installation.
Importance of MPPT in Solar System: Maximizing Solar Power Efficiency
MPPT plays a crucial role in solar systems by extracting maximum power from panels under varying conditions. Learn how MPPT improves efficiency, performance, and savings.
500 kW Solar Power Plant Cost in UP 2025 | Latest Price, Subsidy & ROI
Thinking of setting up a 500 kW solar power plant in Uttar Pradesh? Discover the 2025 cost estimate, available subsidies, and expected ROI. Learn how commercial and industrial projects in UP can reduce energy expenses and achieve long-term savings with solar energy.
Solar Rooftop Subsidy: Why It’s Time for a Change of Mindset
While solar rooftop subsidies help reduce upfront costs, true adoption requires a mindset shift. This guide discusses why businesses and homeowners should focus on long-term benefits, sustainability, and strategic planning beyond relying solely on incentives.
Flat Roof Solar Installation Guide: Design, Mounting Systems & Best Practices
A practical guide to flat roof solar installation covering key design considerations, mounting system types, and best practices for efficient and reliable performance.
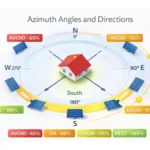
Solar Panel Orientation and Angles: Guide for Solar PV Installers
Earthing and lightning protection are critical safety components in solar PV installations. This guide explains their importance, types, components, and best practices for solar installers.
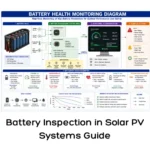
Battery Inspection in Solar PV Systems Guide
A complete guide to battery inspection in solar PV systems, helping identify performance issues, safety concerns, and maintenance requirements.
Solar Module Support & Racking Frame Installation
A practical guide to solar racking frame installation, covering module support structures, alignment, and best practices for reliable PV systems.
Solar Projects Challenges in India: Module Supply Shortages and Policy Delays Slow Growth
India’s utility-scale solar projects face delays due to module supply shortages and policy challenges, impacting the growth of renewable energy.