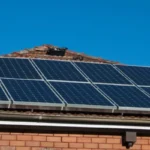
Connecting a solar panel to an MPPT charge controller is one of the most important steps in setting up a safe and efficient solar power system. A correct connection not only improves solar electricity generation but also protects your batteries and increases the overall system life.
In this blog, we explain how to connect solar panels to an MPPT charge controller step by step, along with safety tips, wiring sequence, and a diagram explanation. This guide is useful for anyone planning a solar installation for home, commercial, or industrial use.
What Is an MPPT Charge Controller?
An MPPT (Maximum Power Point Tracking) charge controller is an advanced solar controller that extracts the maximum possible power from solar panels and safely converts it to match battery voltage.
It improves system efficiency, reduces power loss, and plays a key role in lowering the total cost of solar installation by improving long-term energy output.
Why Correct Connection Matters
Incorrect wiring can cause:
- Controller damage
- Battery failure
- Fire risk
- Reduced solar output
A proper setup ensures:
- Stable battery charging
- Higher system efficiency
- Safe renewable energy generation
- Better return on solar energy installation cost
Main Components Required
Before connecting, make sure you have:
- Solar panels
- MPPT charge controller
- Battery bank
- DC circuit breaker/fuse
- MC4 connectors
- Proper DC cables
- Multimeter
- Insulated tools
These components form the foundation of a safe renewable solar power system.
Correct Connection Sequence
Always follow this order:
- Battery → MPPT controller
- Solar panel → MPPT controller
- Load/inverter → battery
This allows the controller to detect battery voltage first and regulate charging correctly.
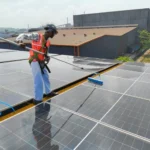
Step-by-Step Guide: How to Connect a Solar Panel to an MPPT Charge Controller
Step 1: Install the MPPT Controller
Mount the controller indoors in a dry, ventilated place, away from heat and moisture. Ensure easy access for monitoring and maintenance.
Step 2: Connect Battery to MPPT Controller
- Identify battery positive (+) and negative (–)
- Connect to the controller battery terminals
- Install a fuse or DC breaker for safety
The controller will power on and detect system voltage automatically.
This step is critical for stable solar electricity storage.
Step 3: Connect Solar Panels to the Controller
- Check panel voltage and polarity
- Use MC4 connectors
- Connect the panel positive to PV+ and negative to PV–
Once connected, the controller will start harvesting energy and optimizing output using MPPT technology.
This step directly impacts solar panel system cost efficiency.
Step 4: Connect Load or Inverter (If Applicable)
Some MPPT controllers support direct DC loads. For AC loads, connect the inverter to the battery bank, not directly to the controller.
This ensures reliable solar energy for home and commercial applications.
Step 5: System Testing
- Check the controller display
- Confirm charging current
- Measure battery voltage
- Inspect all connections
Testing prevents faults that may increase maintenance costs and downtime.
Safety Tips While Connecting
- Never connect panels before batteries
- Avoid reverse polarity
- Use properly rated DC breakers
- Do not touch live terminals
- Ensure proper earthing
- Follow the manufacturer’s voltage limits
These practices protect your investment in renewable energy technology.
Common Wiring Configurations
Solar panels can be connected:
- In series (to increase voltage)
- In parallel (to increase current)
- Series-parallel (for large systems)
MPPT controllers allow higher input voltage, making them ideal for optimizing solar panel area per kW.

How MPPT Improves Solar Output
MPPT controllers:
- Track optimal voltage
- Reduce conversion losses
- Increase daily energy yield
- Improve system ROI
This maximizes power generation per square meter and improves the cost of solar per kWh installed.
Cost Consideration
Although MPPT controllers cost more than PWM, they:
- Produce higher energy
- Protect expensive batteries
- Reduce long-term solar ownership cost
- Improve return on investment
They are especially recommended when evaluating the average cost of solar panels on a house or commercial rooftop.
Conclusion
Connecting solar panels to an MPPT charge controller correctly is essential for safety, efficiency, and long-term performance. A proper installation ensures reliable power, optimized solar harvesting, and strong protection for your entire solar system.
At Smart Roof Solar, we design and install advanced MPPT-based solar solutions to deliver higher performance, safer systems, and better lifetime value from renewable energy.
FAQs
Q1. Can an MPPT charge controller work without a battery connected?
Ans: No, most MPPT controllers require a battery to regulate voltage and operate safely.
Q2. Can I connect different wattage solar panels to one MPPT controller?
Ans: Yes, but mismatched panels can reduce efficiency unless properly configured.
Q3. Does MPPT work better in cold or hot climates?
Ans: MPPT controllers perform better in cold conditions due to higher panel voltage.
Q4. Can MPPT controllers charge lithium batteries?
Ans: Yes, most modern MPPT controllers support lithium with proper settings.
Q5. What happens if solar input voltage exceeds MPPT limits?
Ans: Exceeding limits can permanently damage the controller and void warranties.

Developers fear unfair state-specific levies will make solar more expensive
Developers in India are concerned that state-specific levies on solar projects could increase costs, slow adoption, and impact the growth of renewable energy across residential, commercial, and industrial sectors.

1 MW Solar Plant Cost in Uttar Pradesh | A Complete Guide
Planning to install a 1 MW solar power plant in Uttar Pradesh? This guide covers 2025 pricing, subsidy details, ROI, and savings for industries and businesses.
Industrial Solar Power: 7 Reasons to Make the Switch
Top 7 benefits of solar energy for industries, including cost savings, environmental impact, and improved energy reliability.
How to Calculate PV Power Output? Step-by-Step Guide
Calculating PV power output helps you estimate how much electricity a solar system can generate. This step-by-step guide explains the PV power output formula, examples, and key factors affecting solar energy production.

Solar Rooftop: अपने घर को बनाओ खुद का पावर हाउस | Complete Guide
सौर रूफटॉप सिस्टम आपके घर को पावर हाउस बना सकता है। यह न केवल बिजली के बिलों में बचत करता है, बल्कि साफ और नवीकरणीय ऊर्जा भी प्रदान करता है। जानें सौर पैनल की इंस्टालेशन प्रक्रिया, लागत, लाभ और कैसे यह आपके घर को आत्मनिर्भर ऊर्जा का स्रोत बना सकता है।
Monitoring Services for Solar Plants by Smart Roof Solar to Maximize Performance and Efficiency
Smart Roof Solar provides advanced monitoring services for solar plants to ensure maximum performance and efficiency. With real-time data tracking and intelligent analytics, our monitoring solutions help detect issues early, reduce downtime, and enhance the overall energy yield of your solar system.

New IREDA Loan Scheme for Solar Rooftop Projects: Benefits, Eligibility & Interest Rates
India’s renewable energy push gets a major boost with the new IREDA loan scheme for solar rooftop projects. This scheme offers low-interest financing, simplified approvals, and better support for residential, commercial, and industrial consumers. Here’s a detailed look at its benefits, eligibility, interest rates, and how to apply for funding.

Minimum Land Requirement for Solar Power Plants in India
Understanding the land requirement for solar plant projects in India is essential for accurate planning and approvals. This article explains minimum land needed per kW and MW, key influencing factors, and differences between rooftop and ground-mounted solar plants.